How To Apply And Seal Acrylic Paint On Leather
Leather goods are commonly associated with class, luxury and durability. From extravagant designer labeled bags to protective industrial gloves, leather is renowned and versatile.
One way that you can increase the versatility factor of your leather goods is by having your own artistic touch imbued upon it. It’s not uncommon for owners of leather goods to customize them by applying acrylic paint and even decorations.
However, we have received questions on whether using acrylic paint on leather is advisable and safe. The answer in short is yes, you are able to safely apply acrylic paint on leather surfaces, assuming that you use the right type of paint and follow the right steps, as outlined below.
- Choose Suitable Acrylic Paint
- Prepare Surface Of Leather To Be Painted
- Prime Leather Surface
- Paint Leather Surface
- Apply Finisher To Painted Leather Surface
Before we dive into the steps, let us examine the difference between dyeing leather vs painting on leather.
Dyeing Leather vs Painting Leather
In short, the main difference between dyeing leather vs painting leather (with acrylic paint for example) comes down to how the colors bond with leather. The end result is similar from a visceral point of view. Both processes allow the color and appearance of your leather surface to change.
The process of dyeing leather is much more common in retail applications. This is because the color is actually chemically bonded with the leather, which will therefore last in a much longer and sustainable way as compared to a leather colored via painting.
Using acrylic paint covers the surface of the leather with a colored layer. The actual property and original color of the leather however, does not change. Simply put, painting leather introduces a physical bond between the leather and the material you are using as a colorant.
Therefore, if you are looking to paint your leather with acrylic, you will need to take steps to ensure that the physical bond between your leather and the paint is ideal, and that your paint does not crack and peel easily, leading to an inconsistent and ultimately visually imperfect finishing.
To ensure that you’ll be satisfied with your project, it’s important that you understand how to properly apply acrylic paint on leather and what you’ll need to do is that it seals effectively. Let’s get started!
1. Pick Suitable Acrylic Paint
Picking a high-quality and compatible acrylic paint is essential, and one of the biggest contributing factor is whether your finishing will have any form of longevity on your leather surface.
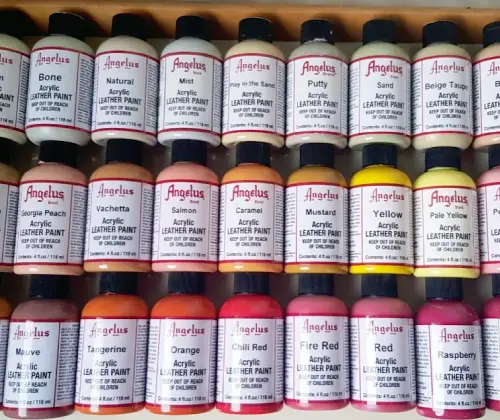
There are specially manufactured acrylic paints that are designed for use on leather surfaces and we definitely recommend that you follow that as strictly as possible. If you do not use a specialized leather paint, you can still take steps to have ordinary acrylic paint mimic the properties of its specialized counterparts.
Normal acrylic paint tends to be much thicker and of a higher viscosity (it’s thicker consistency is much tougher to apply). Therefore, we recommend watering down the paint if you are using the non-specialized version.
Angelus Leather Paint is one of the most common acrylic paints for leather. We use them regularly and recommend them, too. However, any type of acrylic paint that is compatible with leather is workable.
2. Prepare Surface Of Leather To Be Painted
Now that you have selected or prepared an appropriate paint, you need to ensure that the surface of your leather is in an ideal state to be painted upon. There are a few things you will need to consider in this step.
Remove Surface Of Glossy Finishes
If your leather surface is glossy and overly smooth, chances are that one of the following is present.
- Wax
- Oil
- Chemical Coating
It is likely that the physical bond of the acrylic paint you are trying to introduce will be weakened with the presence of wax, oil or any chemical coating. If you are looking to have the paint you apply last longer, you should look to remove the glossy finish to begin with.
You can do this by lightly sandpapering the surface area of your leather to be painted. A 100 – 200 grit (fine) sandpaper should be sufficient for this purpose. Alternatively, you can consider using rubbing alcohol to remove excess oil that might be present on your leather surface.
We prefer using the Angelus Leather Preparer and Deglazer, as it breaks down existing colors and coatings of your leather articles. However, take note that removing the top layer of your leather may alter its appearance and can even damage it if you don’t do it carefully.
You will need to decide if the tradeoff is worth it and we certainly recommend that you do not follow through with either step mentioned if you are dealing with an expensive leather item.
Clean Surface Of Leather
Next, you’ll need to ensure that contaminants and dirt are removed from the leather surface as much as possible before painting it. Foreign agents can result in inconsistent texturing and finishing of the paint when drying.
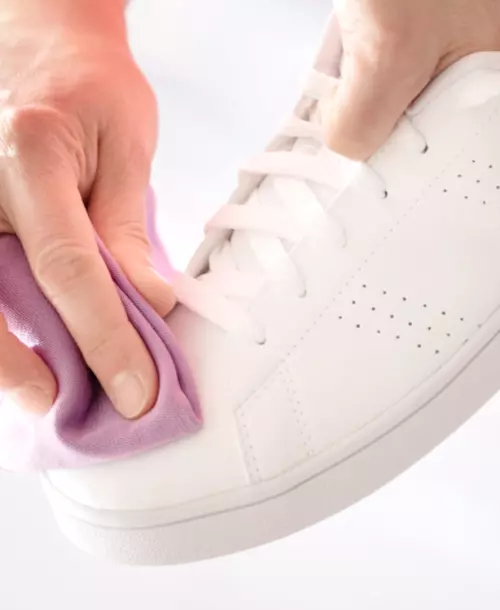
We recommend using a dedicated leather cleaner and a soft microfiber cloth to wipe down the surface area of the leather prior to the painting process. If you want to be extra diligent in this step, use a white microfiber cloth.
Your first clean cycle should darken the cloth, signifying the removal of dirt. Keep repeating the cleaning cycle until you notice that the white microfiber cloth is no longer discoloring when cleaning the leather surface.
Naturally, a common reason people want to color their leather is to coat existing blemishes that they cannot remove. Painting certainly does help mask blemishes, but depending on the nature of the blemish, it might be optimistic to fully conceal it from careful inspection.
3. Prime Leather Surface (Optional)
Leather is extremely porous compared to other materials, which makes for an argument to ensure that the surface is primed before painting it.
A primer is meant to ensure that the surface area to be painted is better prepared to bond with the acrylic paint. You can explore specific primer products that you can purchase.
Alternatively, you can create your own priming solution by introducing a first layer of color onto the surface. It is recommended that you further water down your paint by a factor of about 30 percent to serve as an undercoat.
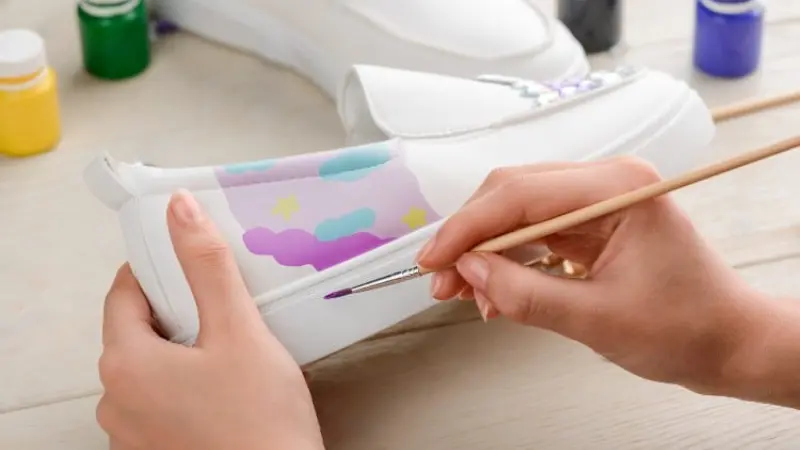
4. Paint Leather Surface
Please ensure that if you have primed your leather prior, that it is fully dry before moving onto this step. You can explore using a stencil that you place atop your leather surface to ensure that you are able to get exactly the imprinted design desired.
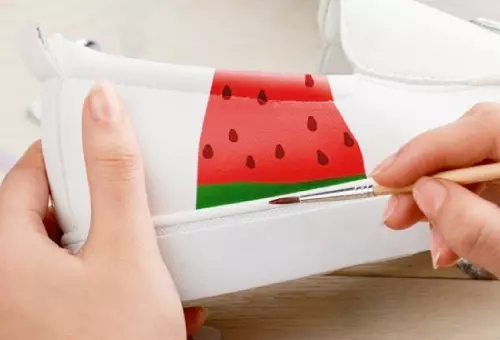
Use a soft paint brush, to apply a thin first coating of the coloring evenly across the leather surface. Allow for the paint to dry, before applying a second, slightly thicker coating which should ensure color consistency across the surface area.
During this process, please do your best to ensure that the coating thickness is as uniformed as they can be. We recommend not to apply more than 2 coatings of paint if possible. As mentioned previously, a paint coat that is too thick can lead to the paint cracking easily down the line.
Feel free to paint your leather articles with your own style and patterns. Just ensure that you apply the acrylic paint as evenly as possible.
5. Add Acrylic Finisher On Painted Surface
Acrylic finishers will help to imbue your paint with a protective layer, further mitigating the risks of cracking or peeling. Finishers largely will be available in two options; mat or glossy.
Please ensure that you purchase the right finisher in accordance to how you want your painted leather to look. While there are many out there, we prefer to use the Angelus Acrylic Leather Paint Finisher that has a glossy finish.
Upon application of your finisher, you should let your painted leather piece dry for at least 24 hours before use. An alternative that you can consider if you do not want to purchase a specialized acrylic finisher would be to use a waterproofing spray.
Useful Tips When Using Acrylic Paint On Leather Products
While we presented you with a step-by-step guide on how to apply and seal acrylic paint on your leather products, we would also like to share some tips that you can consider.
- Apply Even Paint Layers – We encourage you to apply an even coat of acrylic paint on your leather articles. Having paint layers that are too thin or thick may lead to inconsistent colors or the top layer cracking.
- Stick With the Same Brand – As acrylic paints from different manufacturers bond differently and also have different colors, we advise you to stick with one brand only.
- Ensure That Your Leather Article Is Clean – We strongly advise you to thoroughly clean your leather item before applying acrylic paint to it. While it’s a good idea to mask certain scuff marks, layers of dirt may cause the acrylic paint to come off after a while.