
How to Soften Leather Gloves
You might have bought a new pair of leather gloves, or noticed an existing pair stiffening. Either way, you will want to ensure that your gloves are comfortable enough for it to fulfill its original purpose to you. Whether it is meant to protect you from biking, operating machinery, keeping your hands warm or simply making a fashion statement, a pair of brittle gloves will probably not be ideal and might even cause abrasions / blisters.
Softening your leather gloves can be broken down into 4 simple steps, as outlined below.
- Clean your leather gloves
- Condition your leather gloves
- Train your leather gloves to form fit your hand
- Waterproof your leather gloves
1. Clean Your Leather Gloves
This step is extra important and usually overlooked especially if you are looking to soften already used leather gloves. It will not be uncommon for your leather gloves to have accumulated dust, dirt and impurities over a period of time.
Please refer to our step by step guide on how you can effectively clean your leather gloves. Removal of these accumulated elements will help improve maximise the impact of the following steps outlined in this article.
If you are looking to clean new gloves before attempting to soften in, you can look to skip steps 6 – 8 in the linked article. You should also look to be lighter in your applications as well as favouring softer / lighter cleaning solutions for the exteriors of your leather gloves.
2. Condition Your Leather Gloves
You are first advised to test the leather conditioner of your choice in a small, discreet section of your leather gloves. We want to ensure that your leather conditioner does not cause unexpected discolouration or damage to your gloves.
Once you have ascertained that the leather conditioner is safe for general application, you can do so using a cotton ball / cloth or microfiber cloth. Wipe across the entire surface of your leather gloves in gentle, small circular motions to ensure even application.
Let your gloves sit for an hour or two and gently wipe off any excess conditioner on your gloves’ surface with a clean and dry cloth.
Conditioning your leather gloves will help moisturise and soften your leather surfaces, allowing for an easier break in process. However, keep in mind to use a conditioner that is fit for purpose. A good conditioner will help your leather gloves develop patina over time, giving it a classy, aged look.
A rule of thumb is to avoid mineral oils or conditioners that have silicone or petroleum based ingredients. These ingredients could accelerate the oxidation process and ‘decompose’ your leather gloves in the long run.
Speciality leather conditioners are recommended for this purpose. If you are looking for a quick conditioning fix with no concerns over keeping your leather gloves pristine beyond a year or two, olive oil or vegetable oil might be suitable for your purpose.
As always, the key in this step is to not over apply conditioner. Keep in mind the adage of ‘less is more’ in this instance.
3. Train Your Leather Gloves to Form Fit Your Hand
Now that your leather gloves are soft and supple from conditioning, we want to ‘train’ your leather gloves to form fit to your hands. Leather is a material that can stretch, and we want to conform your gloves to the form factor of your hands as much as possible across the softening process.
The best way to do it is to simply wear your leather gloves. You can speed this process up by wearing your gloves whilst at home, doing simple activities or chores. The key is to ensure that the chores you choose do not expose your leather gloves to excessive heat, moisture or sweat.
Some examples of chores and activities you can do include; vacuuming the floor, driving with your gloves on (please do ensure that your gloves are not getting in the way of controlling your steering wheel), watching television, typing on your computer, playing a musical instrument, etc.
Steer clear from activities such as doing wet laundry, gardening, swimming, etc. We want to soften your leather gloves, not damage them. If you are looking at a way to safely quicken the softening process and your gloves are more industrial in nature, consider using the method as outlined below.
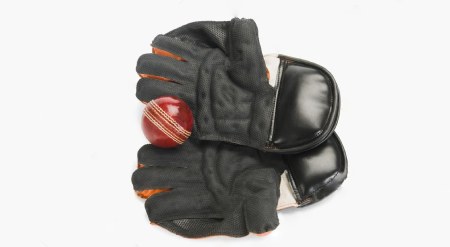
Baseball Method
The baseball method entails the following steps. First, wear your leather gloves. Next, grip a baseball or anything that is round in shape (and hard). Thirdly, use rubber bands to bind your gloves to maintain the grip on the ball. You can now remove your leather glove (with shape maintained and still gripping the ball) from your hand and go about your normal day.
After leaving your leather gloves to sit for 2 – 3 hours, unbind the gloves and wear them, going through a range of stretching motions with your fingers. Repeat the steps as many times as necessary.
4. Waterproof Your Leather Gloves
This step is optional. Whilst waterproofing your leather gloves won’t soften the gloves by itself, it can help to protect potential future stiffening of your gloves through water exposure.
To waterproof your gloves, you are able to use an off shelf spray product. Hold the spray nozzle 10-15cm away from your gloves and spray the product evenly across the gloves. You can wear your gloves during this process. Spreading your fingers during the application process can help ensure that you do not miss the areas between your fingers.
You are also able to create a homemade water proofing solution using beeswax and olive oil. You will end up with a waxy substance that you can then use to rub over your leather gloves. Finish this process by buffing out your leather gloves with a microfiber cloth.