How to Make Leather Tassel Earrings
Leather Tassel Earrings are a very simple yet aesthetically pleasing style of earrings that you can easily make. You also require simple tools and materials for the making process, and they are listed as below. As you can see, stenciling is not even required.
Tools Required:
- Ruler
- Cutter knife
Materials required:
- Small piece of leather
- Earring hooks
- Metal rings – 10 mm diameter
- Adhesive
I would recommend that you consider using a suede material base for this particular style of earrings. This is because the material consistency is closer across both top and undersides of the material as opposed to full grain / top grain leather.
If you are not working with leatherette or vegan leather, I would also recommend ensuring that the cutter knife you are using is sharpened and not dull. We want to ensure that we are able to get very clean cuts across the strips of leather to not create a sloppy aesthetic across your tassels.
The steps for creating a pair of leather tassel earrings can be broken down as follows.
- Measure out Rectangular Area around Leather Base and Cut
- Trim out 12 Strips of Leather
- Insert 5 Pieces of Leather through Metal Ring
- Fold Leather Pieces over Metal Ring
- Tie Folded Leather Strips below Metal Ring
- Apply Adhesive to Knot
- Trim Excess of Leather Strip used for Tying
- Trim Bottom Strips of Tassels (optional)
- Attach Earring Hook to Metal Ring
Additional cosmetic options that you can consider would include painting strips of the leather you had cut out. You are able to alternate colors if you so wish, in which you should look to do so after step 2 and before step 3.
1. Measure out Rectangle on Leather Base and Cut Out Accordingly
Use a ruler to mark out a rectangular perimeter on your leather base. The dimensions I would recommend are as follows; 10 cm height and 4 cm width. For your leather base, I would recommend working with a material that ranges from a 0.5mm to 1 mm thickness. We do not want an overly thick material as that will cause your tassels to look unnaturally stiff.
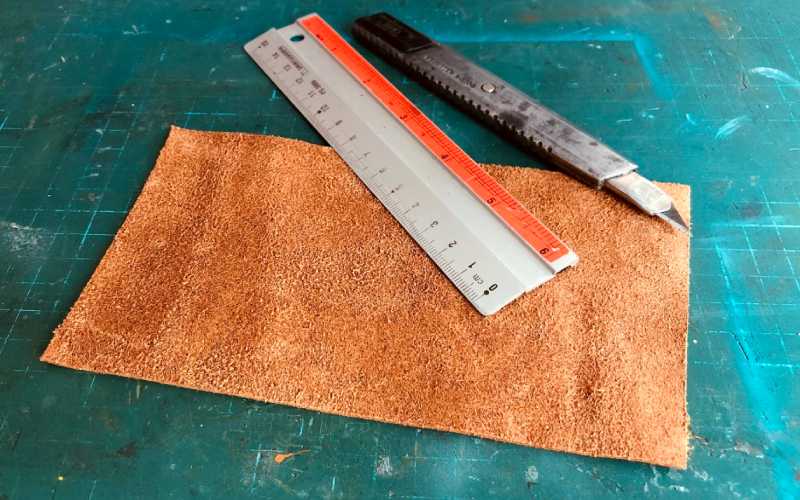
Once you have marked out the area, use your cutter guided by your ruler to create a nice clean cut to leave you with your rectangle.
2. Trim out 12 Strips of Leather
For this step, I cut out 12 strips, each of 0.3mm width. The length of the strips are fully defined by the height of your rectangular leather base, so there is no need to make adjustments here at this stage.

Keep in mind that 12 strips are cut out for a full pair of earrings, if you are looking to make a singular piece, feel free to cut out 6 strips instead.
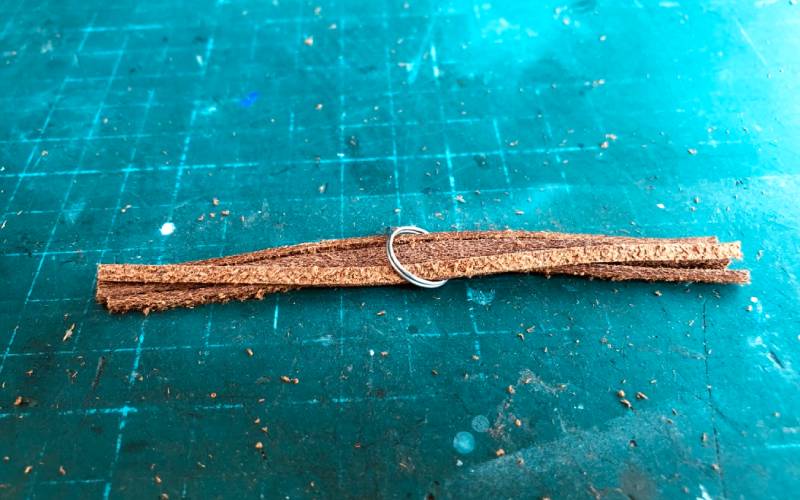
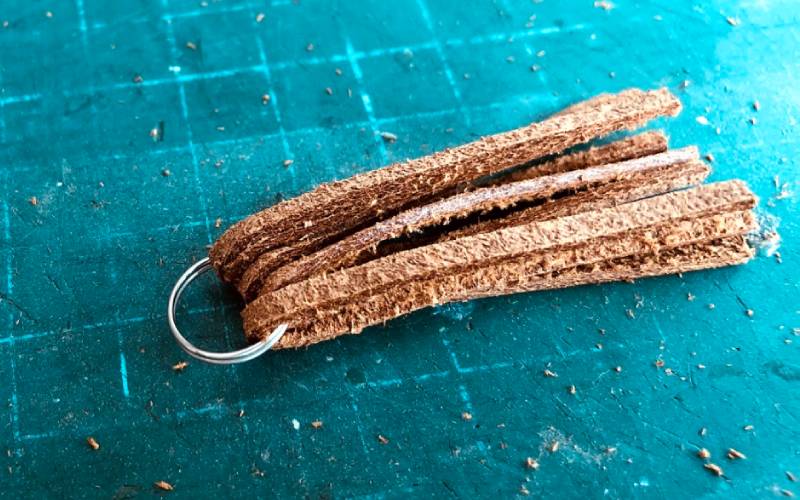
3. Insert 5 Pieces of Leather Strips through Metal Ring
Let us have the metal ring be in or at least close to the middle of the leather strips. By our measurement, this should mean that we have 5 cm of leather on either side of the metal ring.
4. Fold Leather Pieces over Metal Ring
Once folded over, I would recommend to press down on your leather strips so that your strips will start to form some memory over its folded state. Apply moderate pressure directly below the metal ring and hold it for a minute or two.
5. Tie folded Leather Strips
We want to ensure that the tie happens as close to the metal ring as possible. Use one of the leather strips you had cut out in step 2 for this purpose. Ensure that the knot you are tying is on the ‘back side’ of the leather earring. When worn, the knot side should not be visible from the front.

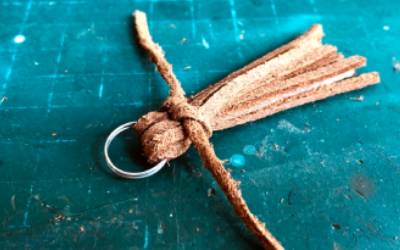
You do not need an intricate knot for this step. A simple overhand knot will suffice, but do ensure that it is pulled tightly without any slack before proceeding to the next step.
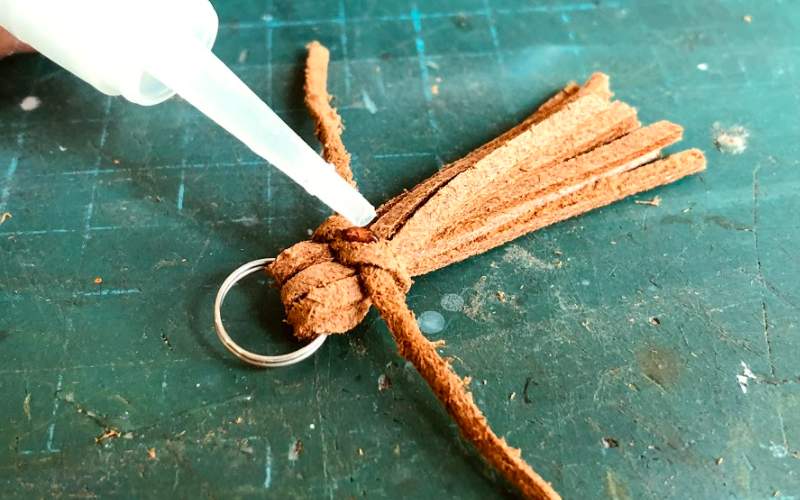
6. Apply Adhesive to Knot
The adhesive will serve to ensure that your knot remains in place. The maintained grip your adhesive provides will prevent untying from happening. Leave the adhesive on for a few minutes to dry on the back of application.
7. Trim off Excess of Tying piece and Tuck Edges
Set your leather earring flat on your workstation and use your cutter knife to trim off the excess pieces of the leather strip that you used to bind your earring in shape. We want to cut as close to the knot you had formed as possible.
If your cut is still leaving excess on the sides that is visible, consider adding another application of adhesive, with the excess pieces pressed to the center of the earring.
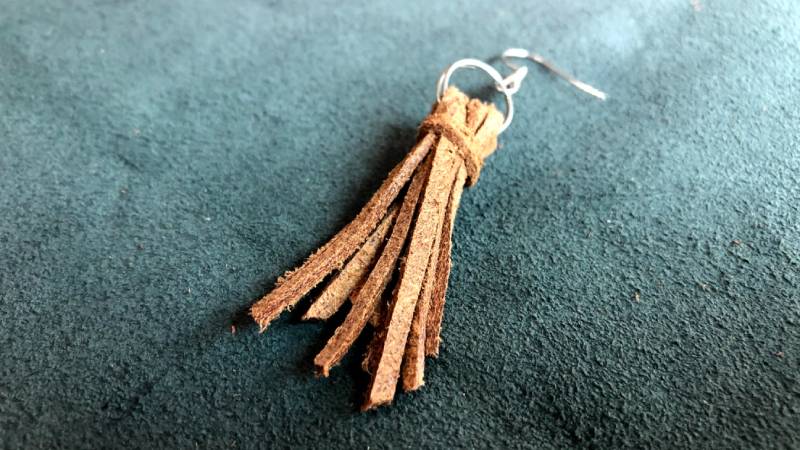
8. Trim the Bottom of your Tassel Earring
This step is optional. A straight cut through the bottom of your tassels will help to unify the length of your tassels, but hopefully this is not required because your fold in steps 3 and 4 was through the middle.
I decided to do an angular cut to create a sloped finishing of sorts. Of course, this is entirely up to your tastes and preferences so feel free to deviate from this step as you see fit.
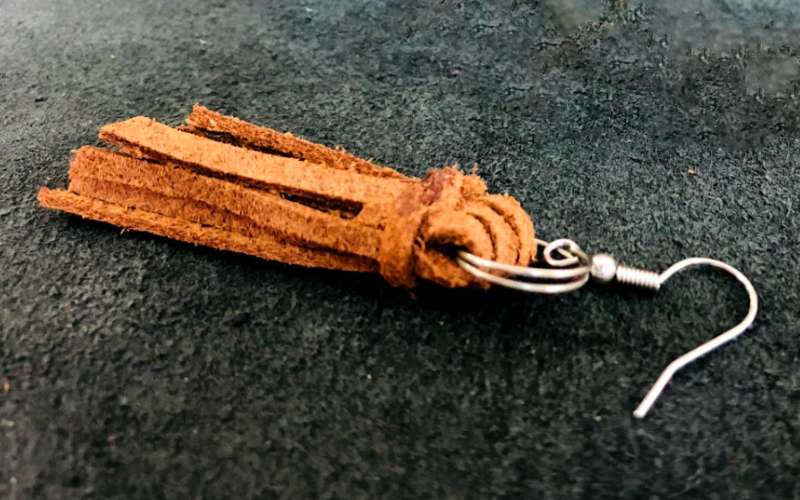
9. Attach Earring Hook to Metal Ring
The final step of the process, ensure that your earring hook is attached securely to the metal ring so that there is no accidental dislodging. Once you have done so, you have a beautiful Leather Tassel Earring that is of your own creation!