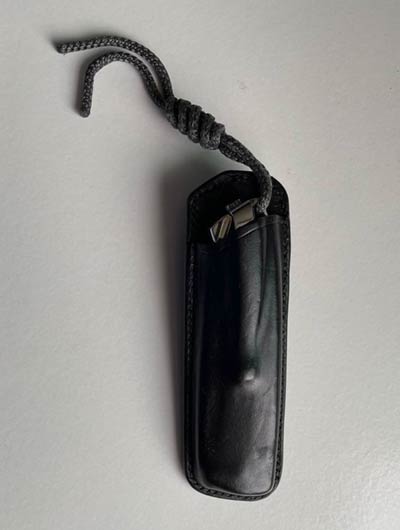
How to Care for a Leather Knife Sheath
A leather knife sheath is a great tool to protect your knife as well as yourself. However to ensure that the knife sheath is able to do the job it is supposed to effectively, the right steps need to be taken. They are as outlined in the following steps.
- Form Leather Sheath to Conform to Knife’s Shape
- Use Leather Knife Sheath with Best Practices
- Clean Leather Knife Sheath after Use if Needed
- Store Sheath Safely
This article will ensure that you are able to both maximise the protection your leather knife sheath offers as well as elongate its shelf life, whilst having it look presentable and sleek.
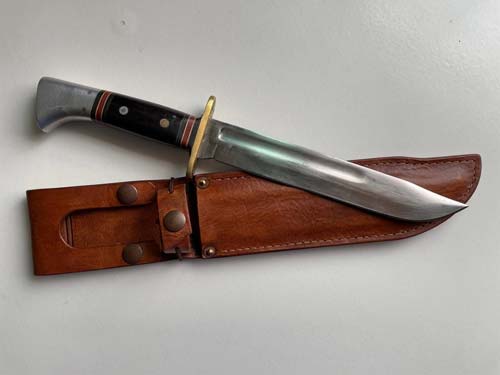
1. Form Leather Knife Sheath
This step is probably the most important step within the process. A knife sheath that does not hold a knife firmly in place is the last thing that you will want.
Similarly, a knife sheath that is too tight will increase likelihood of the knife cutting through the leather sheath, resulting in potential personal injury.
If your leather knife sheath is not custom made against the shape and form of your knife, this step will be critically important.
The ultimate goal of this step is to introduce memory to the leather knife sheath’s form to improve knife grip and retention. A good way to test whether you need to undertake this step is to ask yourself the following two questions. Does my knife fall out of my sheath if I invert the pairing and shake it? Am I struggling to insert the whole of my knife into my sheath?
If you answered yes to either of the questions, please follow the steps as below.
Run Warm Water until Leather Knife Sheath feels Flimsy
I prefer to use a bowl of warm water for this step. Aim to have your water be around the 110 degree (farenheit) mark. Submerge your leather knife sheath in the bowl of warm water for a minute or two. Be careful to not scald yourself in the process by using warmer water.
Once you feel that the structure of the leather knife sheath is flimsy and malleable, remove your leather sheath from the bowl and insert your knife into the sheath.
If you prefer not to use a bowl of warm water, you can also have the sheath under warm running tap water.
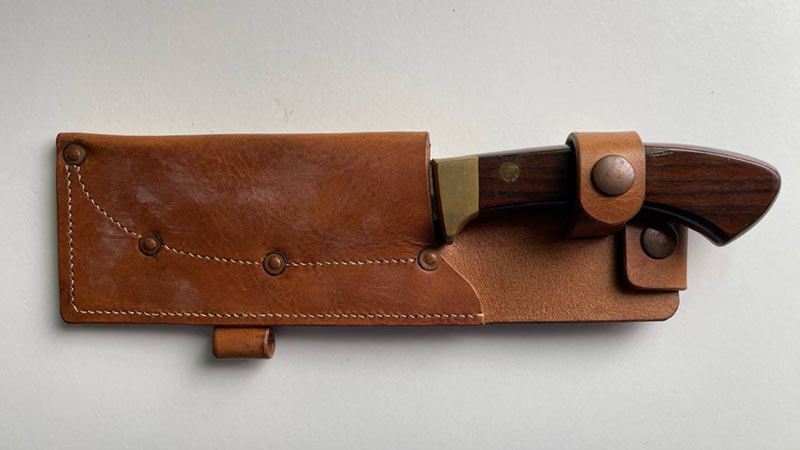
Insert Knife and Press Sheath against Form
With your knife inserted into your wet and malleable leather sheath, start to knead the sheath against your knife’s form. Take extra care to give an allowance around the cutting edge of the knife.
We want to minimise future potential damage during the knife draw / sheathing process, and the allowance will prevent accidental cutting of the interiors of the leather knife sheath.
In this process, you should look to establish a distinct form especially around the handle of your knife. This will allow you a visual cue into how and where you are able to insert your knife in the sheathing process.
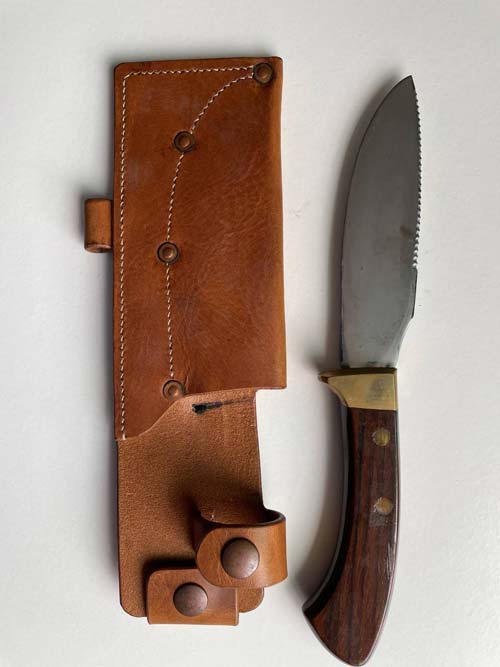
Clean Knife to Remove Water Stains
Once you are satisfied that your molded leather sheath’s shape is distinct against your knife’s form, gently remove the knife from the sheath. Take extra care to not compromise the shape that you have carefully formed.
You will want to dry your knife as soon as possible to prevent any undesired formation of water marks on your blade.
Dry your Leather Knife Sheath Naturally
I would recommend to be generous with time allocation for this step. We want to ensure that the interiors of your leather knife sheath are fully dry before using it, as a wet sheath is not ideal for your blade.
Set your leather knife sheath in a cool, dry environment and leave it to sit for a day or two. Do not try and hasten this process by leaving your leather sheath out in the sun or by introducing unnatural heat in the process.
Certainly do not place your sheath in a dryer or use a hair dryer for this process as this can cause your sheath to be brittle, further increasing the chances of accidentally cutting through your sheath unknowingly.
Across the drying process, I recommend for you to gently insert your knife every ~6 hours or so to help reinforce the shape memory of your leather sheath. As per before, do dry your knife after each insertion.
Lightly Condition your Leather Sheath
Sparingly apply conditioner to the exterior of your leather knife sheath, using a dry soft micro fiber cloth for application purposes. Take extra caution to not press against the shape you had carefully formed in step one of this process, and do not over moisturise.
The thinnest of application layers will help mitigate against brittleness, whilst also not softening your leather sheath to the point where your sheath’s desired form factor gets compromised.
2. Use Leather Knife Sheath Safely
Now that your leather knife sheath is dry and nicely form fitted, you are all set to start using the sheath. There are certain best practices you can consider to help protect your leather sheath.
Depending on your usage and where you are planning to bring your sheathed knife, do consider waterproofing your leather sheath with off the shelf water proofing products.
Chances are, you are bringing your sheathed knife to an outdoor environment and sun exposure is inevitable. If at all possible, try to avoid elongated sun exposure for the same reasons in the drying process; you do not want your sheath to prematurely harden and get overly brittle.
On the flip side, if you do end up in a situation whereby your sheath gets exposed to liquids, I would recommend to wipe it dry as soon as possible. On the same note, if you have used your knife, do wipe your knife dry / clean before reinserting it into the sheath.
A relatively common sensical point; while your leather sheath offers a user protection from the knife, the protection is not absolute and you should avoid sitting on your knife sheath in case you are placing undue stress against the sheath. Your knife could cut through the sheath and cause you personal injury in such a situation.
3. Cleaning Leather Knife Sheath
If your leather knife sheath is superficially dirty on the exteriors, I would recommend that you use a specialised leather wipe to wipe off the accumulated dirt and grime. Take extra to not press your formed leather sheath out of shape during this process.
If dirt or mud has gotten into the interiors of your leather knife sheath, it might make sense to soak your sheath to prevent your knife from getting dirty after future insertions.
Soak your sheath in warm water and use a soft long brush to ensure that you are able to remove any unwanted sedimentation from the inners of your knife sheath. Once you are confident that this step is completed, it is important to re-form your leather knife sheath, as outlined in the first step of this article.
4. Storing your Leather Knife Sheath Safely
With your sheath clean and not in immediate usage need, you will want to ensure safe storage conditions. Store your leather knife sheath in a cool, dry environment. Be careful to not leave your sheath in a location that has sun exposure.
If you are storing your leather knife sheath for a long period of time, do condition your leather knife sheath every 5-6 months. This will prevent any unwanted hardening of your sheath, which will increase the chances of your knife cutting through your sheath in future uses.
Whilst one of the purposes of your leather knife sheath is to protect your knife, I do not recommend storing the sheath with the knife inserted for elongated periods of time.
This is to prevent the natural oils of your leather from potentially staining or damaging the blade of your knife.