How to Distress a Leather Jacket
Walking through the streets wearing a distressed leather jacket with your favorite sunglasses can make you look and feel like a rock star. However, have you ever thought about what actually makes these distressed leather jackets look so good?
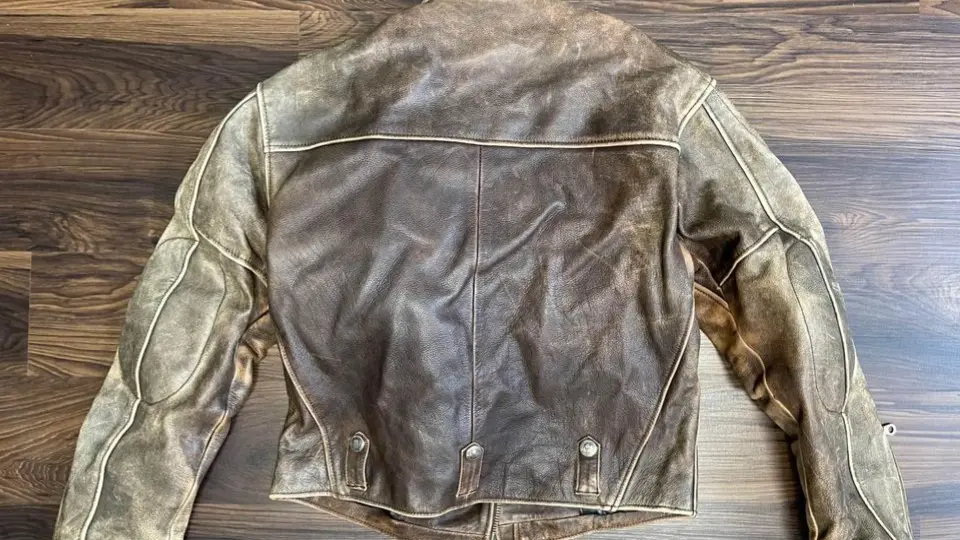
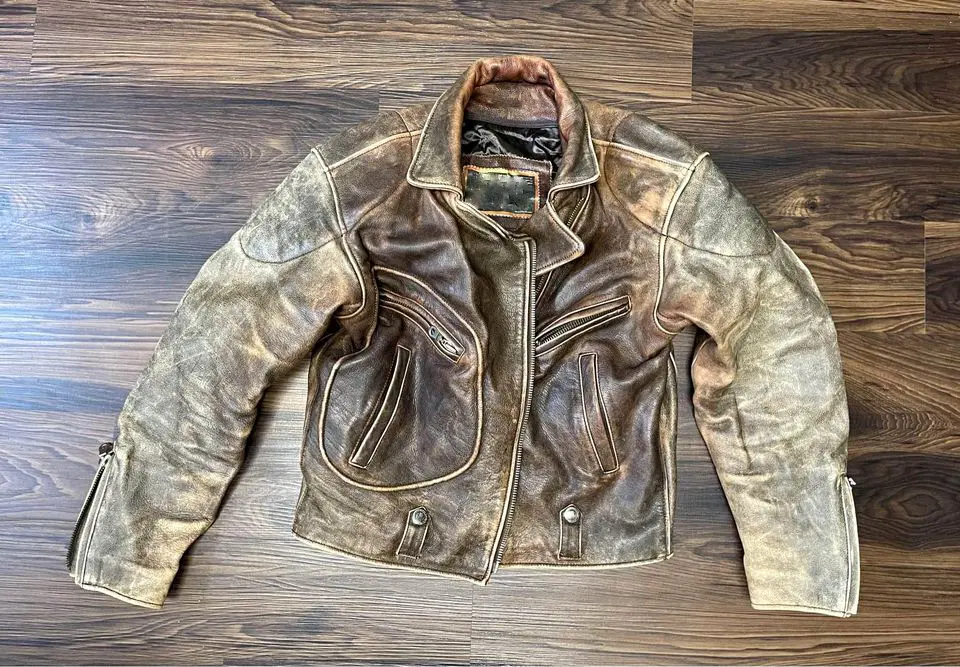
The features that help distressed leather stand out are its appearance and texture, which give the perception of ruggedness. If you look close enough, no two distressed leather jackets look the same.
This is because distressing leather is a unique and individualized process that results in unique markings and wear patterns on each leather jacket. Distressing a leather jacket isn’t as difficult as it appears and you can easily achieve this by using any combination of the methods that we’ve outlined below.
- Method 1: Through Natural Wear
- Method 2: Sandpapering Your Leather Jacket
- Method 3: Dragging Your Leather Jacket In Terrain
- Method 4: Using Heat
- Method 5: Using Acetone And Sawdust
Keep in mind that since you will be damaging the leather to give the impression of a worn-in, vintage jacket, it is best to be clear about your decision. This is because these methods leave permanent visual changes.
Method 1: Natural Wear
The most convenient way to distress your leather jacket is to wear the leather jacket as you normally would and allow natural wear and tear. While it’s also the safest method, it may take months or years, depending on how often you wear it.
This method allows the jacket to mold to your body best as the material adapts to the shape of your body, developing creases, scuffs, and fades that will give it that lived-in, vintage look.
If you want to naturally distress your leather jacket, we suggest wearing it as often as possible, especially in different weather conditions, so that the material wears in faster and more effectively.
Creasing Your Leather Jacket
If you wear leather jackets frequently, you’ve likely observed the formation of creases around the elbow area and arm and shoulder seams as a result of movement.
If you’d like to speed up the creation of creases, you can try tying a gentle knot around the sleeves’ elbow region and letting it sit for one to two days. We suggest twisting the jacket’s body and applying pressure to it to encourage creasing in various sections of the leather jacket.
We also recommend that you re-tie and retwist your jacket after one or two days so that the creases formed are not uniform and appear to be more random.
Method 2: Sandpapering Your Leather Jacket
If you really want a grungy and worn-out look, the best way to achieve it is with some fine-grit sandpaper. You don’t have to distress every part of the jacket evenly with sandpaper but rather focus on larger areas, corners, and seams.
If you are choosing this distressing method, be sure to sand the back, shoulders, and sleeves of the jacket. Since sanding leather can be quite damaging to the material, it is important that you don’t overdo it.
Start by carefully sanding around the seams and stitching. We do not want to possibly damage any threading or sewing that can cause structural damage to your leather jacket.
Method 3: Dragging Your Leather Jacket in Terrain
Another great way to achieve a distressed look on your leather jacket is to drag it along a rough surface. You can also make the distressing process more effective by adding weight to the jacket, allowing it to come into contact with an uneven surface.
The friction and sharp stones on the ground will damage the upper surface of your leather jacket and give it a grungy and vintage look. Be sure to drag it across the terrains using different parts to ensure that you cover all areas.
Method 4: Using Heat
Heating your leather jacket is another way to distress the material and make it look more worn out. However, take note that heat can harden parts of the leather and may even char it if you are not careful.
To achieve an aged look, heat up specific parts of your jacket using a candle, lighter, or blowtorch. Caution is advised as your jacket may get damaged or burnt in the process.
It is recommended to test the effect of heat on a small, inconspicuous area before applying it to larger sections. Use heat sparingly for finishing touches after trying other distressing methods.
It’s also important to avoid heating areas near the seams as threads or stitching may accidentally ignite.
Method 5: Using Acetone And Sawdust
One of the easiest ways of distressing a new leather jacket is to dab it with some acetone and rough it up with sawdust. Acetone takes away the dye of the leather jacket and causes the supple material to become dry, which makes it the perfect distressing product.
While we’ve always advised against using acetone on leather, it works well for distressing purposes only. Similar to the other methods we’ve listed, it’s always a good idea to test the effect of acetone on a small hidden part of the jacket.
Continue the application until you are satisfied with the results. If you don’t have acetone, you can also apply rubbing alcohol (also called isopropyl alcohol) instead. We’ve listed the steps below for your reference.
Step 1: Apply Some Acetone
The first step in the process is to apply acetone to your leather jacket with paper towels. This can allow you to remove the dye and topmost layer of your new jacket and cause it to develop a vintage look.
We recommend wearing gloves during this process to protect your skin from the chemicals.
Step 2: Expose Your Leather Jacket to Sawdust
To make your leather jacket look worn out, you should rub it against the ground with some sawdust. The dust and the uneven surface will act as an abrasive and scratch the jacket’s smooth surface, making it look worn out and aged.
Since applying the acetone might give your black leather jacket a blue tint, rubbing it with sawdust can allow you to remove it and give it a sandy yellowish appearance.
Step 3: Use the Distressing Methods Listed Above
To further distress your leather jacket, you can use the sandpaper method or drag it across the terrain, as mentioned earlier. This will allow you to make your jacket look unique and give it a more naturally distressed appearance.
Step 4: Apply a Neutral Color Leather Conditioner
Applying acetone takes away the natural moistening agents present in leather, leaving it dry and vulnerable. If you want to protect your jacket from further acetone damage, make it smoother, and ensure it is water-resistant, you should apply a neutral color leather conditioner to it.
This will counteract some of the damage done by rubbing alcohol and acetone in the long run. You can apply the conditioner in certain parts of the jacket by sprinkling, rubbing, or applying the product all over the surface according to your preference.
Step 5: Reapply Sawdust
If you aren’t satisfied with the final outcome or color of your jacket after applying the leather conditioner, you can always achieve the sandy appearance again by reapplying and rubbing some sawdust on it.
This will give it a more permanent distressed and sandy look since the conditioner will mix with the dust and prevent water from wiping it away. This step is optional and should only be taken if you want to further alter the color of your leather jacket.
Frequently Asked Questions
Below, you’ll find some frequently asked questions from our readers that we’ve answered.
Can You Restore a Distressed Leather Jacket?
While it is possible to restore distressed leather jackets to a certain extent, most of the methods permanently change their appearance. Take note that the extent of restoration depends on the severity and type of distress.
Some minor forms of distressing, such as scuffs or scratches, can be buffed out or covered up with a leather conditioner. However, more severe forms of distressing, such as tears or deep scratches, may require professional repair or even replacement of the affected leather panel.
How Long Does It Take to Distress a Leather Jacket
The time it takes to distress a leather jacket depends on the method that you’ve selected and the degree of distressing desired. Some methods, such as sandpapering or dragging the jacket on the ground, can create a distressed look relatively quickly, within a matter of minutes.
However, other methods, such as natural wear and tear or exposure to the elements, can take weeks or even months to achieve the desired look.