How to Distress Leather Boots Safely & Effectively
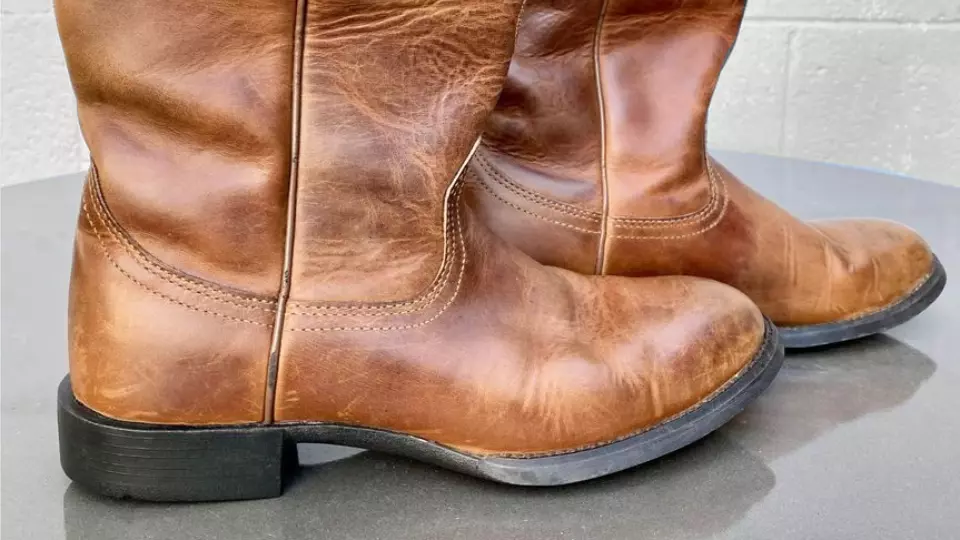
Leather becomes distressed over time, as it develops natural scratches and scuff marks, shows signs of discoloration, and forms creases. It is a gradual process that takes place due to natural wear and tear.
While distressed leather boots look worn-in, it also lends them a weathered appearance. Certain people find this look more appealing, as it gives their boots more character.
Fortunately, achieving that look isn’t difficult, but distressing leather incorrectly can lead to permanent damage. Therefore, we’ve prepared a step-by-step guide for you on how to safely and effectively distress leather boots.
- Distressing Through Natural Wear
- Distressing With Rubbing Alcohol
- Distressing By Hammering Them
- Distressing Using Sandpaper
- Distressing With a Baseball Bat
Take note that the methods and processes mentioned in this guide will change the appearance of your leather boots. It’s crucial to consider this carefully since their effects are permanent and irreversible.
We have also listed ways that you can best protect your leather boots in the long run based on the methods you might be choosing. Let’s get started!
Method 1: Through Natural Wear
One of the most convenient ways to distress leather boots is to wear them frequently so that they naturally appear worn. As leather ages, you may notice changes in its texture, color, and patina.
You might also see some creases at the front part of your leather boots (near the vamp or toe cap), as they adapt to how your feet move and your boots fold. They may even develop scratches and scuffs if you wear them frequently.
Exposure to water, oils and general friction can force leather to show signs of wear. This can cause your leather boots to feel more pliable after regular use, giving them a more distressed look.
This method of distressing is the safest and easiest but also takes the longest. Take note that it can take anywhere from a few weeks to several months to distress leather boots through natural wear.
For the best results, we recommend that you condition your boots regularly throughout this process to ensure that they remain well-protected.
Method 2: Using Rubbing Alcohol
While we advise against using rubbing alcohol for cleaning leather – since it can irreversibly damage the material – it can be an incredibly effective product for distressing leather boots.
Applying rubbing alcohol can quicken the distressing process and makes your leather boots look faded and worn. It can also cause a change of color in leather, which is why you must check its effect in an inconspicuous area before use.
If you are satisfied with the result, move on to distressing the complete leather surface of your boots with rubbing alcohol. Moisten a soft cloth lightly with rubbing alcohol and apply it to your leather boots.
Allow it some time to dry, and you will begin noticing how the rubbing alcohol begins to give your leather boots a grungier look. If you are going with this method, we recommend mitigating the damage that rubbing alcohol can cause.
You can do this by moisturizing your leather boots after the rubbing alcohol has fully dried after the application – any off-the-shelf leather conditioner should do the trick nicely here.
Method 3: Hammering Your Leather Boots
You can also distress your leather boots by using a hammer. However, you’ll need to use this technique carefully and not overdo it. Too much hammering can deform your leather boots, which can lead to discomfort when wearing them.
To achieve a naturally distressed look, without overdoing it, take a blunt hammer and lightly hammer your leather boots. A blunt hammer can prevent the leather material from tearing. During this process, ensure that you apply even force.
As this method can break the natural fiber structure of your leather boots, it’s important that you preserve their shape. To prevent your boots from deforming, we recommend storing them safely using a shoe tree.
Method 4: Using Sandpaper
Use 320-grit sandpaper to lightly sand them. You can also use lower-grit sandpaper if you want to cause noticeable scratches and wear marks, but we recommend starting with high-grit sandpaper first.
Sanding leather gives it an aged appearance, as parts of the surface layers get removed through the process. Therefore, we recommend that you only sand certain areas of your leather boots.
Doing this promotes texture inconsistency and lends the leather material a more naturally weathered appearance. After sanding the surface, use a clean microfiber cloth to gently remove the residue.
Method 5: With a Baseball Bat
Similar to using a hammer, you can also use a baseball bat to give your leather boots a worn and distressed look. By hitting the boots as you would strike a pinata, you can make them appear more worn and creased.
For this method, you should hang them by their laces against a hook and strike them with a baseball bat. Make sure that the boots don’t swing away as you hit them so that they fully absorb each hit.
Although it might seem over the top, this method of distressing leather boots is relatively safe and can be very effective if combined with some of the other methods that we’ve mentioned above.
Baseball bats do not have sharp edges and are blunt, which won’t cause the leather material to tear. Although this method may not be as effective as other distressing techniques on its own, it can be pretty fun and stress-relieving.
Frequently Asked Questions
We’ve received several inquiries from some of our readers to share more information about some of our best practices and important tips when it comes to distressing leather boots. We’ve included some of our answers below for further reference.
Which Method Works The Best?
All the methods mentioned above can be used to distress your leather boots safely. If you want effective results, we recommend using a combination of the abovementioned distressing methods.
However, you should not overdo it! Take your time when distressing or patinating leather, as you don’t want to excessively damage, tear or rip your boots in the process.
Can I Reverse The Distressing Effects?
Before using any of the above-mentioned processes, you need to understand that by distressing your leather boots you are effectively quickening the natural aging and wear and tear process.
As you are intentionally damaging the leather by scuffing, wearing, and beating it, the effects on your leather boots will be permanent. This is why you should feel confident about the desired outcome before starting the process.
How Do I Care for Distressed Leather Boots?
After you’ve successfully distressed your leather boots, you need to remember that they still need regular maintenance and care. Avoid exposing your leather boots to direct sunlight or water, and store them in an open, cool, and dry place.
Doing so will prevent further damage to them and keep them safe from mold and mildew. You will also need to clean and condition the leather boots regularly so that they remain supple and last for years to come.