How to Tighten Leather Seats: Easily Remove Wrinkles & Creases
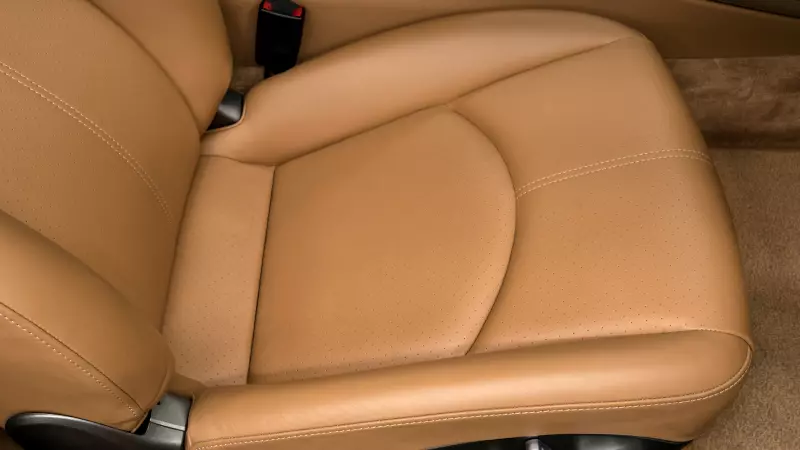
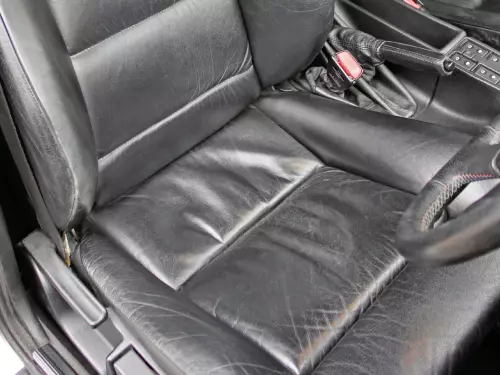
Leather seats can make your car look plush and feel comfortable, creating a luxurious and premium atmosphere. However, there’s a downside to them as well. Leather seats can begin to wrinkle and wear with age, giving them an untidy and unappealing appearance.
Moreover, you’ll also notice sinking into your leather seat, rather than it giving you the required support while sitting or driving. In this article, we will explore the best methods to tighten your leather seats, by removing wrinkles and creases while increasing their firmness and support.
The most effective method to tighten your leather seats is to apply controlled heat using either a hairdryer, a heat gun, an iron, or a steamer. These methods use heat and pressure to straighten, tighten and restore your leather seat.
Why Do Leather Seats Wrinkle & Stretch
Leather is a supple and moldable material that can wrinkle and stretch for various reasons. If you have leather car seats installed, it’s extremely common for them to become stretched over time due to prolonged use.
Additionally, they can begin to wrinkle and crease due to humidity, moisture, high temperatures, and inconsistent pressure when seated. Another common reason for wrinkling and stretching of leather seats is the improper initial installation of the leather upholstery, which is often overlooked.
One of the best ways to fix this is to tighten the leather upholstery. Before we get to that, let’s take a closer look at why leather seats stretch and wrinkle in more detail:
- Age – With age, leather becomes drier and begins to shrink, causing it to wrinkle and crease. Leather seats that have been in use for years or those left exposed to direct sunlight (especially when parking your car outside under hot sun) can even lead to cracking making them more prone to stretching.
- Incorrectly Upholstered – Leather seats can begin sagging and stretching if there is not an adequate amount of foam in them or if the foam support has deteriorated with age. Stretching of leather seats can also happen if they haven’t been upholstered correctly.
- Prolonged Use – Leather car seats are also prone to stretching when they experience constant pressure and stress, as the leather upholstery is supple and can change shape. This is why the driver’s car seat will almost always be the most stretched-out leather seat in a car.
- Inconsistent Pressure – If a person is used to sitting in a particular spot in the passenger or back seat, the leather material of the seat will mold according to the pressure applied to it. Sitting in car seats applied inconsistent pressure on the leather material, which will cause sagging and wrinkling over time.
- Exposure to Moisture – Leather can dry up and shrink when it gets exposed to moisture. This causes the shape of the leather seat to mold once it’s stretched. This problem is more common in humid environments or in climates with high-temperature fluctuations.
You should know that it’s completely natural for leather to stretch over time due to the physical pressure they are exposed to, as well as regular use and other factors which we have highlighted above.
The best way to restore your leather car seats is to stretch them using some of the methods that we’ll go through below. Please ensure to follow the methods and processes carefully to avoid damaging your leather seats.
Best Ways to Tighten Leather Seats
Tightening leather car seats requires patience and careful application of heat and pressure. Controlled heat can cause the leather to shrink, as the leather fiber structures tighten during this process.
At the same time, this also removes most of the wrinkles and creases from your leather seat. However, be mindful that you’ll need controlled heat. Too hot and you’ll damage your leather; not hot enough and it won’t have any effect.
There are several methods that let you apply controlled heat, which will tighten the leather upholstery in your car, but it is important that you clean your leather car seats with a proper leather cleaner first, before starting the process.
We recommend using leather cleaning wipes such as Armor All Leather Care Automotive Wipes to remove all debris, dirt, and grime from your leather car seats beforehand. A good wipe-down should do the trick!
Method 1: Using a Heat Gun
A heat gun can be used to tighten your seats and rid them of wrinkles by tightening the fiber structure of the leather. As you clean your leather car seats prior to heat application, ensure to let the conditioner and cleaner dry naturally before you apply any heat.
- Plug in the heat gun and put it in the lowest setting. Heat guns have a temperature range between about 100 °C and 550 °C.
- Hold the heat gun about 4 – 5 inches away from your leather seat and move it around any wrinkles, saggy areas, and creases. Remember not to focus the heat gun on a particular area for long.
- Occasionally, wipe the leather car seats with a lightly damp microfiber cloth to create a steam effect.
- Continue this process until you see the leather tightening, then leave it to dry. Turn off the heat gun after this process is completed.
Method 2: Using an Iron
The second method revolves around using an iron. An iron provides good control for the heat application process and also asserts pressure on the affected areas of your leather seats.
- Put the iron on the lowest setting and place a towel or cloth over the area that needs tightening. The towel or cloth will prevent the iron from direct heat contact through the iron and prevent your leather from getting damaged.
- Lightly press the iron into the towel and move it around using circular motions to cover the affected areas of your leather seats.
- Once the leather has tightened and the wrinkles have been removed, you may turn your iron off.
Method 3: Using a Steamer
A steamer works best for leather that has inconsistently shrunk or is sagging in particular areas. The hot moisture from the steamer re-expands parts of the leather sets and tightens it for a more finished and smoother look.
- Wrap a thin cloth around the steamer and run it across the sagging surfaces of your leather seat.
- Ensure that you don’t only just focus on a single spot for too long. Instead, keep the steamer in motion as often as you can.
- Focus on applying steam between the leather and the foam (and around the seams) for best results.
Method 4: Using a Hair Dryer
The heat from a hair dryer can also shrink the leather fibers, allowing you to straighten out and tighten your leather seats. It is one of the easiest ways to restore their original appearance.
- After cleaning the leather seats, turn on the hairdryer to its hottest setting.
- Ensure to place the hair dryer away from the leather seat at a distance of about 8 – 10 inches.
- Keep the hair dryer constantly in motion, and remember not to focus on a single spot for too long.
- The heat from the hair dryer will slowly remove the wrinkles and gradually tighten the leather. The process may take some time but will offer amazing results.
- Once you’re happy with the results, you can turn off the hair dryer.
Other Methods to Tighten Leather Seats
Aside from the four extremely effective methods listed above, there are a few other ways you can tighten leather seats. The following methods listed below are much more intricate and require more time and effort. For some of them, you may want to approach professional services:
- Reupholster Leather Seats – If your leather car seats have been installed incorrectly or are wrinkling and stretched out beyond repair, then it may be best to reupholster them. These services are commonly available at leather repair and car upholstery shops.
- Restitching Leather Seats – Another way to remove and fix stretched-out leather seats is to unstitch the leather material and restitch it more tightly. This helps to tighten them, at the same time removing any form of wrinkles and creases.
- Replace Leather Seats – Replacing the entire leather seat may be an expensive option, but if they’re too old or worn to be repaired, it may be the best one. Before purchasing new leather seats, ensure that they are properly upholstered and stitched.
While you are able to do some of these methods yourself, you’ll need to do proper research, understand each of the processes and use the right tools.
If you’re unsure how to proceed we highly recommend that you approach a qualified professional who has adequate experience. They will be able to offer you advice and even the required services at a reasonable cost.